How to Use Adhesive Stencils: The Complete Guide
Adhesive stencils offer a unique advantage over traditional mylar stencils: they stick directly to your surface for ultimate control and crisp, clean lines. If you've struggled with stencils that shift during painting or want to work on curved surfaces, adhesive stencils might be your perfect solution.
What Are Adhesive Stencils?
Adhesive stencils feature a sticky backing that adheres directly to your painting surface. We make them from clay-coated polyethylene, a thick, tacky vinyl-like material that's more durable than regular stickers but different from traditional mylar.
Key Difference from Mylar: Unlike stiff, slippery mylar stencils that require tape or spray adhesive, adhesive stencils have built-in stickiness that holds them securely in place.
Why Choose Adhesive Stencils?
Advantages:
- Crisp, clean edges - The adhesive seal minimizes paint bleed
- Works on curved surfaces - Flexible material conforms to rounded objects
- No shifting during painting - Stays put without tape or spray adhesive
- More controllable - No slippery stencil movement while you work
- Reusable 1-3 times - More uses than a sticker, though less than mylar
Best for: Projects requiring the cleanest possible lines, curved surfaces like mugs or bottles, or situations where you need maximum stencil control.
Durability Note: Mylar stencils can be used almost indefinitely, while adhesive stencils are designed for 1-3 uses depending on the surface and paint type.
Step-by-Step Instructions
Step 1: Remove the Adhesive Backing
The main difference between adhesive and mylar stencils is the initial prep. Your stencil arrives with a protective backing that must be removed before use.
Tips for removal:
- Peel slowly and carefully
- Start from one corner
- Keep the stencil flat to avoid creasing
- If the stencil curls, lay it flat before applying
Step 2: Position and Smooth the Stencil
Place your stencil on the desired surface, positioning it carefully before pressing down (the adhesive grabs immediately).
Smoothing technique:
- Run your hand over the entire stencil
- Press firmly on all areas, especially around cutout edges
- Use a credit card or squeegee for extra-smooth application
- Ensure no air bubbles or lifted edges remain
Why this matters: Any gaps between the stencil and surface will allow paint to seep underneath, causing bleed. Thorough smoothing is essential for crisp lines.
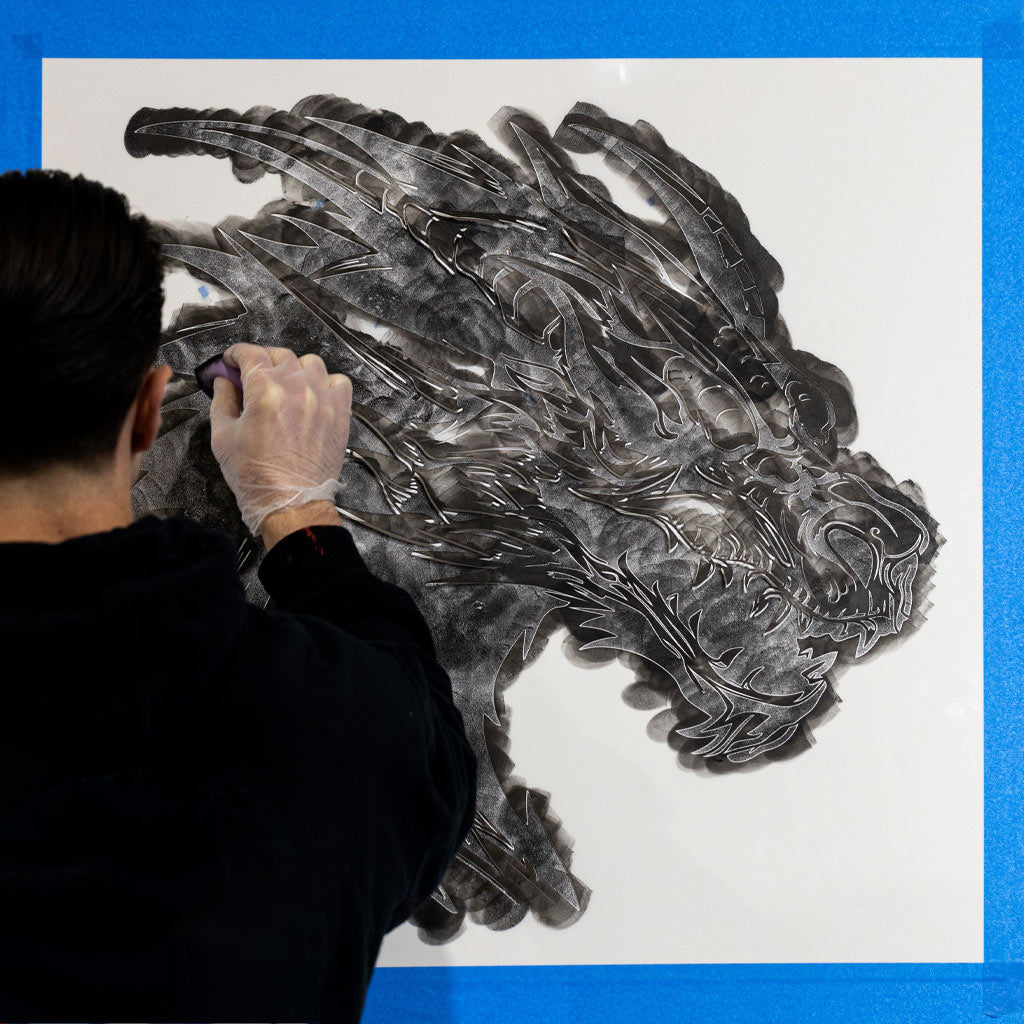
Step 3: Apply Your Paint
Once smoothed, paint your stencil using your preferred method.
Paint options that work well:
- Spray paint - Hold 10-15 inches away, use short bursts
- Acrylic paint with brush - The adhesive holds firm, so brushing won't shift the stencil
- Dabbing method - Especially effective on fabric (see our t-shirt stenciling tutorial)
- Paint roller - For larger designs
Adhesive stencil advantage: Because the stencil is stuck down, you can use painting techniques that would normally shift a mylar stencil, like brushing or rolling.
Step 4: Peel and Reveal
Wait a moment for the paint to set (timing depends on paint type), then carefully peel up the stencil.
Peeling tips:
- Pull slowly at a low angle
- Start from one corner
- The adhesive makes this step extra satisfying!
- If reusing, place back on backing paper or non-stick surface
Working with Multiple Layers
Yes, you can create layered designs with adhesive stencils!
Multi-layer stenciling with adhesive stencils follows the same principles as mylar, with one critical caveat:
Critical rule: Ensure the first layer of paint is completely dry before applying the second adhesive stencil. The adhesive backing can pull up wet or tacky paint, ruining your first layer.
Layering process:
- Apply and paint first stencil layer
- Remove first stencil
- Wait for paint to fully cure (follow paint manufacturer's dry time)
- Test a corner - paint should be completely dry to the touch
- Carefully position second stencil layer
- Smooth down thoroughly
- Paint second layer
- Remove and enjoy your multi-layered design
Pro tip: For metallic finishes or contrasting colors, adhesive stencils create beautifully crisp layer separations.
Reusing Adhesive Stencils
While not as infinitely reusable as mylar, adhesive stencils can typically be used 1-3 times:
First use: Full adhesion, strongest hold
Second use: Good adhesion, may need extra smoothing
Third use: Reduced adhesion, best for smooth surfaces
Storage between uses:
- Place back on original backing if available
- Store on parchment or wax paper
- Keep flat to maintain shape
- Store in cool, dry place
Factors affecting reusability:
- Surface texture (smooth surfaces preserve adhesive better)
- Paint type used
- How carefully the stencil was removed
- Storage conditions
Choosing Between Adhesive and Mylar Stencils
Choose Adhesive Stencils when:
- You need the absolute crispest lines possible
- Working on curved or irregular surfaces
- Stenciling on fabric or textured materials
- Using brush-on paint methods
- You want maximum control and minimal setup
Choose Mylar Stencils when:
- You'll use the same stencil 10+ times
- Working on very large projects
- Need the most durable option
- Budget is a primary concern
- You're comfortable with spray adhesive or tape
Troubleshooting
Problem: Stencil won't stick
Solution: Ensure surface is clean and dry. Dust, oils, or moisture prevent adhesion.
Problem: Paint still bleeding
Solution: Smooth more thoroughly and use less paint. Multiple light coats beat one heavy coat.
Problem: Stencil pulling up when removed
Solution: Wait longer for paint to dry completely before peeling.
Problem: Lost adhesion after first use
Solution: This is normal. Clean the stencil gently and try on a smooth surface for best second-use results.
Ready to Try Adhesive Stencils?
Browse our collection of custom adhesive stencils for your next project.
Have questions about which stencil type is right for your project? Contact us at support@stencilstop.com or DM us on social media. We're here to help you achieve perfect results!
Written by Colin Mitchell
Leave a comment
This site is protected by hCaptcha and the hCaptcha Privacy Policy and Terms of Service apply.