Transforming a Mid Century Modern TV Console
What do you do when you have a Facebook Marketplace fail? You DIY it, of course!
Last week we bought this mid-century TV console thinking it would be, well, a lot better than it was. When we got it it was covered in cigarette burns, scratches, and loads of dust. As a mid-century furniture lover, I couldn’t give up on this piece. The metal feet were too good to let this get trashed.
So let’s get our sandpaper, primer, paint and a custom mylar stencil ready.
Before getting started, I collected materials and sketched out what I planned to do.

Here's the plan:

We’ll admit it, we’re taking some inspiration from vintage Atlantic City, minus the crowded beaches and casino losses.
Materials:
- A custom or ready-made stencil from our shop
- A hideous and dirty TV console in need of some TLC
- Sandpaper (most grits are fine)
- Primer
- High gloss paint
- High gloss spray paint
- Paintbrushes
- Painter’s tape
- Newspaper or other scrap paper
Let’s get started!
Step 1: Prep

This lovely find needed to be cleaned, scuff sanded, and primed before painting. First, we used some wipes to get rid of gunk, dust, and smudges. The outer vinyl veneer was worse for the wear, so we’re going to use everything in our power to cover it.
In order to ensure that the primer was going to stick to the veneer, we used some rough sandpaper to make scratches the primer could grab onto. We rounded out some of the corners as well, as the veneer was also beginning to chip on some edges. This console was made of particleboard underneath, which is very easy to shape with some sandpaper.
Luckily, we could easily disassemble this piece like some IKEA furniture. I removed the handles and put them aside for later as well.

We used a typical primer meant for home interiors. Two layers was enough to prepare for the final paint color. When priming, you don’t need to make sure the entire piece is covered in white. We did about two coats before painting.

Woohoo! Priming is done. Let’s get to the fun part.
Step 2: Painting
I chose a high-gloss, bright orange paint to really drive home the retro feel I wanted for this console.

Our paint was relatively thin, so it may take a few coats to get it right. Before using your stencil, you’re going to want to make sure that your paint fully dries. If you don’t you can risk the mylar sticking to tacky layers of paint.
Step 3: Using your stencil
Now for the part we’ve been waiting for: the stencil! I created a custom stencil for this project in the shape of some retro stars.
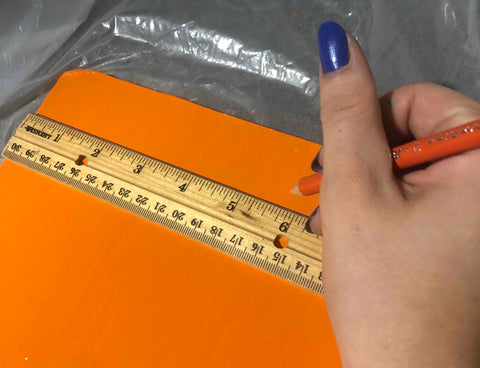
I started out by locating the center of the doors I planned on painting using a ruler and a pencil. Because I’m going to be surrounding the stencil with some paper to protect the rest of the door face, I’ll need some guidance on where to place the stencil.

Once I made my marks, I used some newspaper to surround the stencil and secured it with some painter’s tape.

I used a Rust-Oleum high-gloss spray paint one would usually use for furniture to match the high-gloss finish of the orange paint. With a few quick spritzes, we’ll have some nice detailing on our doors.

I repeated the same process on the top of the console and created a pattern out of just one stencil.

Step 4: Finishing touches
Almost there! We just have to make a few final changes before we can say we’re fully finished.
The handles were a boring metallic brown color, so I used the same spray paint to make them bright blue.

After everything was dried, it was time to reassemble the console. With doors and legs all back in place, we were ready to take some final pictures!


We were able to transform this piece of furniture from something headed for the dump to a fun and colorful retro statement piece.

Leave a comment
This site is protected by hCaptcha and the hCaptcha Privacy Policy and Terms of Service apply.